
Reviewed · SILVER & JEWELRY WORKSHOPS
Ubud Town Center Silver Class – Create Your Own Silver Jewelry
Small tools, real silver, and a souvenir you can wear. This Ubud class gives you a hands-on way to spend part of the day, guiding you from a rough piece of silver to a finished ring, pendant, or bracelet. I like the small group limit of 14, and I like that your finished piece is personal rather than another shop-bought trinket. The main catch is that the class can be physically tiring, and designs using more than 5 grams cost extra.
You get close help from the instructors throughout the process, which matters if you have never worked with metal. The complimentary snack, mineral water, and Wi-Fi are useful touches during a session that may last anywhere from one to three hours, depending on your design.
In This Review
- Key points before you book
- Arriving on Jalan Bisma in central Ubud
- Choosing a design you can actually finish
- Turning pure silver into a workable bar
- Shaping a ring, pendant, or bracelet
- Adding patterns and personal details
- Sanding away the rough edges
- Polishing the finished silver
- What the 5-gram silver allowance really means
- The group size, comfort, and practical setup
- Who will enjoy this class most
- Cancellation and booking details
- Should you book the Ubud Silver Class?
- FAQ
- Where does the silver jewelry class take place?
- How long does the class last?
- What type of jewelry can I make?
- How much silver is included?
- Is there an additional silver charge?
- Is transportation provided?
- Can I cancel for a refund?
Key points before you book
- You make one piece from start to finish: Choose or sketch a design, shape the silver, add detail, sand it, and polish it.
- The class begins with at least 5 grams of silver accounted for: A piece weighing less than 5 grams is still charged as 5 grams.
- Extra silver costs 85,000 IDR per gram: This applies to jewelry weighing more than 5 grams.
- You receive hands-on guidance: Patient staff, including an instructor named Lau, help with the more demanding stages.
- The class takes place on Jalan Bisma: You begin and finish at Ubud Town Center Silver Class in central Ubud.
- The setting suits mixed-age groups: The workshop is wheelchair and stroller accessible, and service animals are allowed.
Arriving on Jalan Bisma in central Ubud
The workshop is at Ubud Town Center Silver Class, Jl. Bisma, Ubud, Kecamatan Ubud, Kabupaten Gianyar, Bali 80571. This is a meeting-point experience, not a hotel pickup service, so you need to make your own way there. The activity finishes at the same place.
That simple arrangement can be a plus if you are already staying in central Ubud. You avoid a long transfer and can fit the class around a morning walk, lunch, or an afternoon visit elsewhere. If you are staying farther out, remember that shuttle service is not included.
The booking confirmation arrives when you reserve. The venue is near public transportation, and the workshop can accommodate wheelchairs and strollers. Those details make this easier to plan than many craft activities held in small, less accessible spaces.
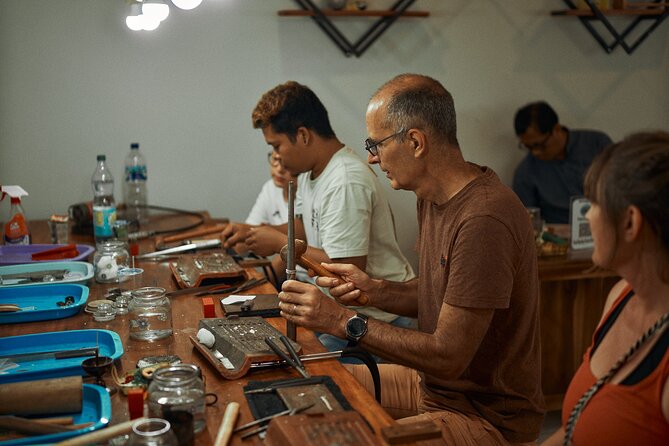
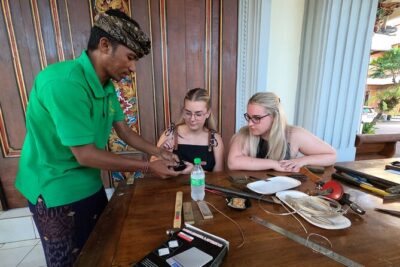
The class has a maximum of 14 people. That is not a private lesson, but it is small enough for the staff to move around and offer individual help. Metalwork often involves several steps where a quick correction saves you from ruining the shape, so access to an instructor is more important here than it would be in a simple painting class.
More Jewelry Workshops in Ubud
- Ubud Silver Class Jewelry making in bali
★ 5.0 · 978 reviews - Ubud Monkey Forest Silver Class – Craft Your Own Silver Jewelry
★ 5.0 · 254 reviews - Ubud Bali Silver Jewelry Class
★ 5.0 · 163 reviews
Choosing a design you can actually finish
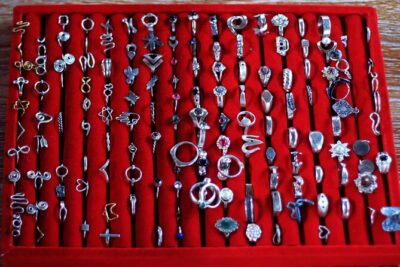
Your first creative decision is the design. You can select from example patterns or sketch an idea of your own. Samples of rings and other jewelry give you a useful starting point if you arrive without a clear plan.
I recommend keeping your first design manageable. A plain ring with a small engraved detail may be easier to complete than a wide bracelet covered in fine patterns. The class allows one jewelry piece per participant, so you do not get to make several small items from the supplied silver.
This one-piece limit has two sides. It keeps the session focused and gives you enough time to finish something properly. It also means you should think before the class begins about the type of jewelry you want. A ring, pendant, or bracelet will require different decisions about size, shape, and decoration.
The staff can help you turn a rough sketch into a workable piece. That is especially helpful if your drawing looks good on paper but would be difficult to form in metal. The strongest part of the class is not simply making an object. It is seeing how an idea changes as you work through each stage.
Turning pure silver into a workable bar
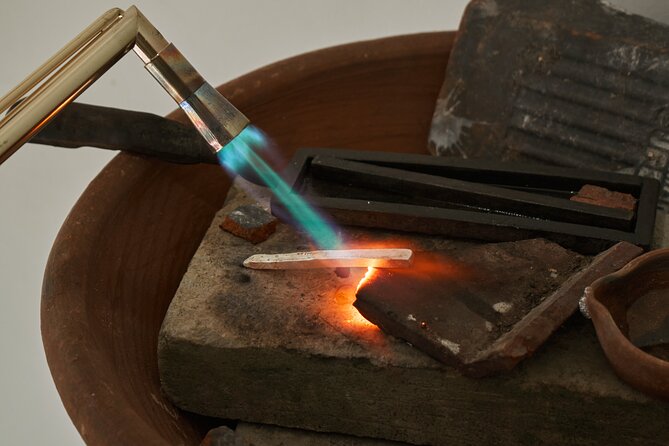
The process begins with pure silver being melted and poured into a silver bar. You then see that bar rolled and pressed until it reaches a useful thickness.
This is where the class moves beyond a decorative demonstration. You are not just watching an artisan make jewelry and then stamping your name on it. The silver passes through several practical stages before it resembles anything wearable.
The physical effort is real. One person described the session as fun but tiring, with work that builds up leg and arm fatigue. That is useful warning, especially if you expect a relaxed craft lesson with little exertion. The repeated rolling, shaping, sanding, and polishing require patience as well as creativity.
You may also gain a new respect for the price of handmade jewelry. The final piece represents more than the raw metal. It includes design work, repeated shaping, skilled correction, and careful finishing. Even a simple ring can involve plenty of labor before it reaches a smooth shine.
Shaping a ring, pendant, or bracelet
Once the silver reaches the right thickness, you shape it into your chosen item. The class can produce a ring, pendant, or bracelet, with the final result depending on your design and the amount of silver used.
This is the stage where small mistakes become visible. A ring must be formed to the right size. A pendant needs a shape that hangs properly. A bracelet has more length and may require more silver, which can affect the final cost.
The instructor’s help is valuable here. Staff members are described as kind, skilled, and patient, and Lau is singled out for calm assistance during the full process. You still do the work yourself, but you are not left to guess what to do next.
Do not expect a factory-perfect result. Handmade jewelry carries small signs of the maker’s hand, and your piece may have slight variations in its shape or engraving. That is part of the appeal, provided you are comfortable with a souvenir that reflects your own level of experience.
A completely different kind of day out in Ubud:
- All-Inclusive Ubud Private Tour
★ 5.0 · 14,344 reviews - Best of Ubud Full-Day Tour with Jungle Swing
★ 5.0 · 8,571 reviews - Ubud: Monkey Forest, Jungle Swing, Rice Terrace, and Water Temple
★ 5.0 · 7,160 reviews - Best of Ubud 1-Day Private Tour
★ 5.0 · 4,451 reviews
Adding patterns and personal details
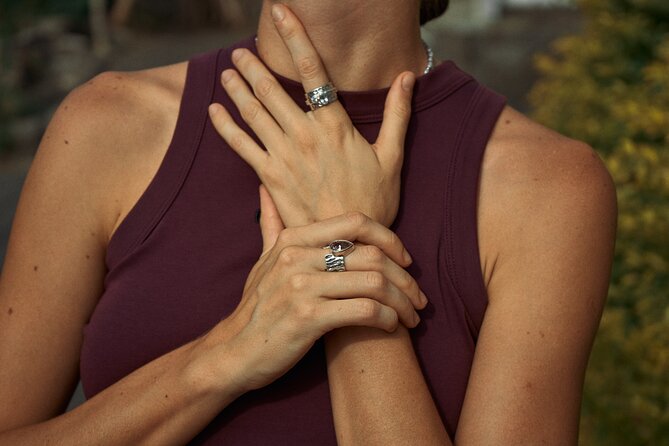
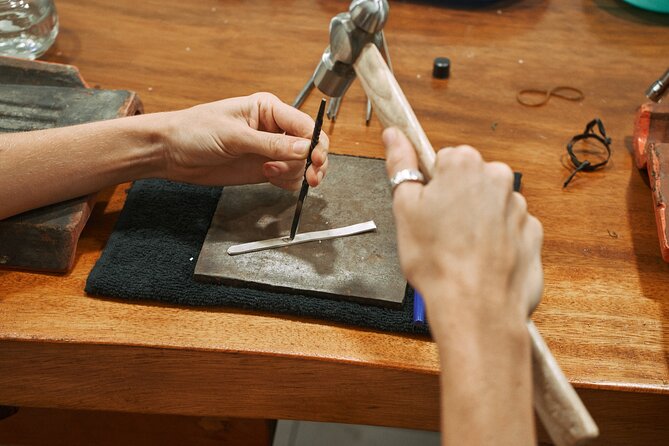
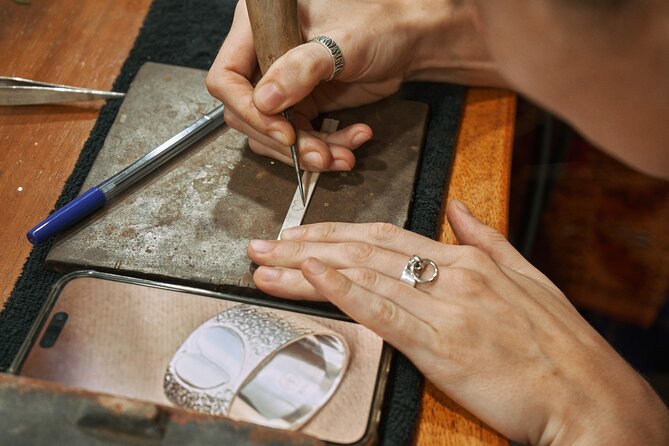
After forming the main shape, you engrave details into the surface. You can use an existing pattern or add marks connected to your own idea.
Engraving is one of the most personal parts of the activity. A shop-bought bracelet may look polished, but it does not carry the same connection to your time in Ubud. Here, the marks you make become part of the finished object.
The practical point is to avoid overloading the design. Fine details take time and require steady work. If you want an intricate pattern, you may spend longer at the bench and could also use more than 5 grams of silver, depending on the shape and size.
Your instructor can help keep the design achievable. That guidance matters for first-time makers, because it is easy to plan something far more complex than the class time allows. A clear, simple design usually gives you the best chance of leaving with a finished piece you are happy to wear.
Sanding away the rough edges
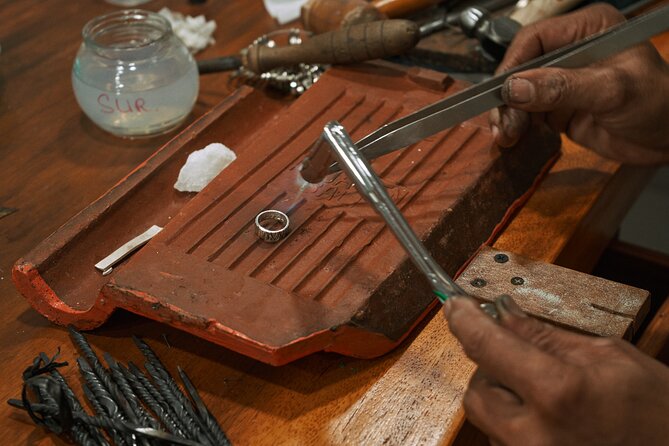
Sanding refines the form and smooths rough areas. It is less glamorous than the melting or polishing, but it is one of the stages that determines how comfortable the jewelry feels.
This work takes care. A rushed sanding job can leave sharp edges or an uneven surface. The physical effort also adds to the tiredness noted by past participants. You will use your hands and arms repeatedly, so plan on a practical, work-focused experience rather than a passive cultural show.
The payoff is easy to understand. A rough silver shape slowly becomes an object that feels finished. Sanding also gives you time to inspect the design and notice details that need correction before polishing.
Polishing the finished silver
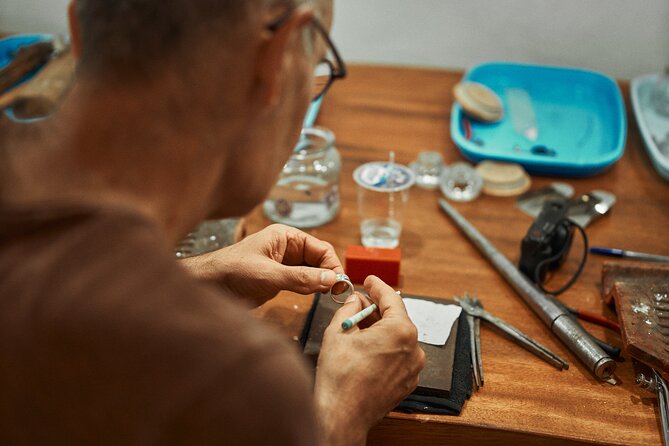
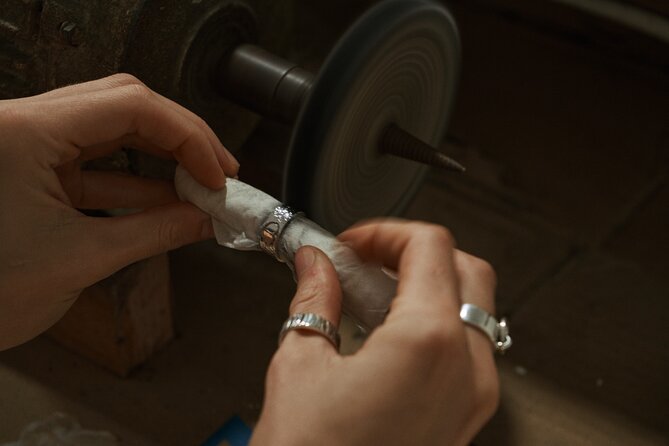
Polishing gives the jewelry its final shine. This is the satisfying last step, when the hours of shaping and sanding turn into something ready to wear.
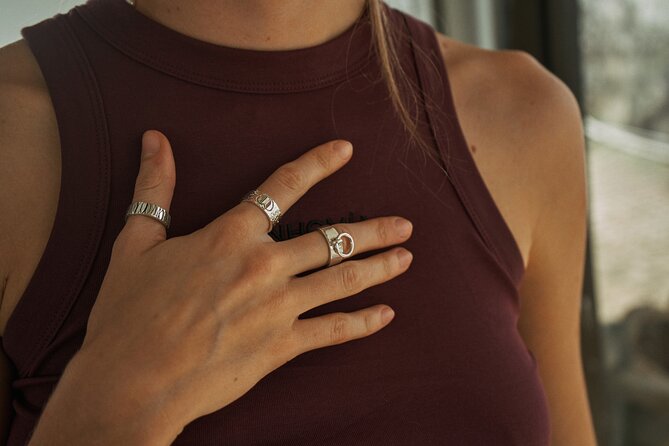
You leave with one handcrafted silver piece that reflects the design you selected and the work you put into it. The finished jewelry also makes a convenient end-of-stay souvenir. It is small, useful, and less likely to sit forgotten in a drawer than a decorative object.
The result will depend on your design, your care, and the guidance you accept. The class promises a finished silver creation, but it does not promise that every piece will look like a professional jeweler’s work. That is a fair trade for making it yourself.
What the 5-gram silver allowance really means
The price is listed at $41.87 per person. The value depends on how much you care about the making process, not just the amount of silver you take home.
Each participant can make one piece using silver starting from 1 to 5 grams. The important pricing detail is that anything below 5 grams is still accounted for as 5 grams. You cannot split the silver with another person, and each participant must make a separate piece.
If your finished jewelry weighs more than 5 grams, the added charge is 85,000 IDR per gram. A broad bracelet or a thick ring is more likely to push you above the included amount than a small pendant or delicate ring, though the final weight depends on your design.
I would decide on a general shape before arriving and ask the staff about the likely silver weight. That helps you avoid an unwanted extra charge. The additional fee is clear, but you should still treat the listed price as a starting point for larger designs.
For the right person, the price is reasonable. You receive instruction, materials, tools, a snack, mineral water, Wi-Fi, and a finished handmade item. If you only want inexpensive jewelry, a market stall will cost less. If you want the memory of making your own silver piece, this offers more value than a simple purchase.
The group size, comfort, and practical setup
The maximum group size is 14 people. That gives the activity an intimate feel without making it a private workshop. You should receive more direct assistance than in a large demonstration class, though the amount of one-to-one time will depend on how many people need help at a particular stage.
The class is wheelchair and stroller accessible. Service animals are allowed, and most people can participate. These are useful features for a mixed group, although the practical work still involves hand strength, repeated movement, and concentration.
Complimentary Wi-Fi is available at the workshop. It is not the reason to book, but it can help you stay connected while you work or send a photo of the finished piece. Mineral water and a snack are included, which is welcome during a session that may run for three hours.
The stated duration ranges from one to three hours. A simple design may move faster. More detailed jewelry can take longer. The three-hour estimate is the safest way to plan your day, especially if you have another timed activity afterward.
Who will enjoy this class most
I would recommend this experience to you if you like making things with your hands, want a personal souvenir, or prefer a creative activity to another sightseeing stop. It also works well for couples or friends who want to spend a few hours creating separate pieces side by side.
It suits first-time makers because you receive help at each stage. You do not need to arrive with silversmithing experience, and the design samples give you a starting point.
You may want to choose another activity if you dislike repetitive hand work, have a very tight schedule, or want to make several pieces. The class limits each participant to one item, and the work can be tiring.
Families should note the stroller accessibility, but the supplied information does not specify a minimum age. If you are booking for a child, confirm suitability before paying.
Cancellation and booking details
You can cancel at least 24 hours before the local start time for a full refund. Cancellations or changes made within 24 hours are not accepted for a refund.
The ticket is mobile, so you can show it from your phone. Since there is no shuttle, allow enough time to reach the Jalan Bisma meeting point. The activity ends where it begins, making it easy to continue exploring central Ubud afterward.
Should you book the Ubud Silver Class?
Book it if you want a souvenir with a story attached. The strongest reasons are the full start-to-finish process, patient guidance from staff such as Lau, and the chance to create one piece that is truly yours.
Go in with a sensible design and a little patience. Keep an eye on the 5-gram allowance, remember that extra silver costs 85,000 IDR per gram, and expect some arm and leg work. If those conditions sound enjoyable rather than inconvenient, this is a worthwhile three-hour addition to an Ubud stay.
FAQ
Where does the silver jewelry class take place?
The class takes place at Ubud Town Center Silver Class, Jl. Bisma, Ubud, Kecamatan Ubud, Kabupaten Gianyar, Bali 80571, Indonesia.
How long does the class last?
The activity lasts between one and three hours. The exact duration depends on the complexity of your jewelry design.
What type of jewelry can I make?
You can make one silver jewelry piece. Possible designs include a ring, pendant, or bracelet.
How much silver is included?
You can make jewelry starting from 1 to 5 grams of silver. If the finished piece weighs less than 5 grams, the silver usage is still accounted for as 5 grams.
Is there an additional silver charge?
Yes. Silver weighing more than 5 grams costs an additional 85,000 IDR per gram. Silver cannot be shared with another person.
Is transportation provided?
No. Shuttle service is not included. You need to reach the meeting point on Jalan Bisma yourself, and the activity ends back there.
Can I cancel for a refund?
Yes. You can receive a full refund if you cancel at least 24 hours before the experience start time. Cancellations or changes made less than 24 hours before the start time are not refunded.
Just added around Ubud
- Ubud Hidden Gems Private Tour with Local Expert & Hotel Pickup★ 5.0 · 4 reviews
- Nusa penida private senorkeling with Manta★ 4.0 · 4 reviews
- Bali Exciting Thriling Adventure: River Rafting, ATV Ride, Swing★ 5.0 · 4 reviews
- Tanah Lot Sunset Tour with Kecak Show and Dinner★ 5.0 · 4 reviews
- Make Your Own Bali Silver Jewelry Class with Balinese Family★ 5.0 · 4 reviews
- Bali Sunrise Trekking and Natural Hot spring Tour★ 5.0 · 4 reviews
- Private Tour Highlight of Bedugul and Jatiluwih Rice Terrace★ 5.0 · 4 reviews
- Bali Half Day Photography Tour★ 5.0 · 4 reviews
Silver & Jewelry Workshops, compared.
Ubud Monkey Forest Silver Class – Craft Your Own Silver Jewelry
Read our review →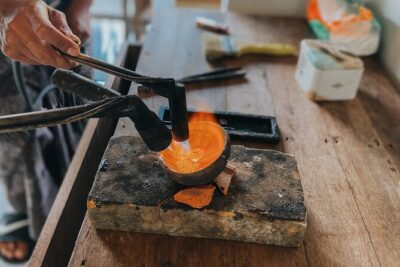
Private Traditional Bali Silver Jewelry Making Class
Read our review →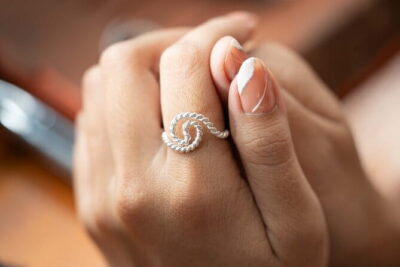
Kuta Bali Silver Jewelry Making Class Near Kuta Beach
Read our review →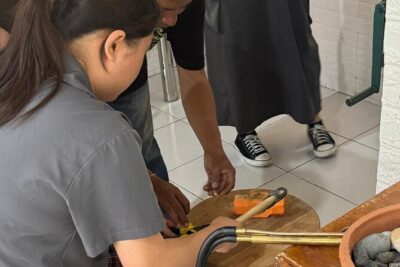
Silver Jewelry Making Class in Seminyak and Legian
Read our review →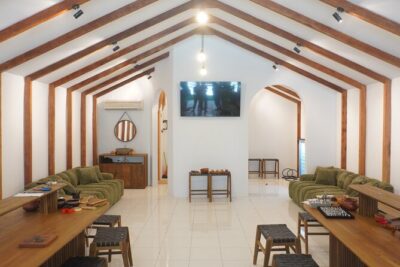
Bali Seminyak Silver Class Activity and Take Your Own Creation
Read our review →Browse the lists this tour appears in